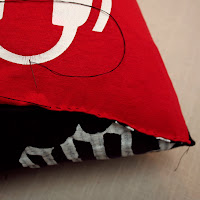
Punk Rock Pillows
A Craft Tutorial brought to you by Melississippi of the Phoenix United Crafters Society
Crafter Difficulty Level: Sewing = Easy, Crafting = Hard
Materials: Sewing machine, needle & thread, pins, 10 or so T-shirts, pillow or stuffing, ruler, fabric pencil
Introduction: I think this craft will appeal to anyone who was into going to concerts (shows as we called them back in the day) and buying band T-shirts. The shirts themselves were only like $10-$20, but the nostalgia associated with them makes them priceless. Eventually though, you outgrow the shirt, or it gets old, ripped, etc-but you still can't throw it out! I realized my husband and I had a box of say 20 or more T-shirts that we were never going to wear again, but couldn't bear to part with. Inspired by the work of Boo Davis and her Quiltsryche Quilts I attempted a smaller project, a pillow. The making of this pillow included shirts from Melississippi's collection: Limp, Before Braille, At.The.Drive.In, The Get up Kids, Reel Big Fish, and Jimmy Eat World. And Tom's collection: The Bouncing Souls, Number Two, Filter, and Sonic Youth.
Step 1: Cut down your T-shirts.
(This step may be the hardest, not in the difficulty level, but because these shirts always made you feel like a bad mamma jamma walking around high school. I mean, wearing this T-shirt to school the next day means you went to the show last night, that was something!) Anyways, back to the cutting. First, I rough cut the shirts to get rid of the collar and sleeves etc, just into a big square or rectangle.
Step 2: Iron the squares & rectangles
Always iron on the backside of the fabric (not the logo!). First iron them flat, then using your ruler iron them into nice neat squares and rectangles. Try and leave 1 to 2 inches around the logo.
Step 3: Pin together pieces and sew, and then repeat, repeat, repeat.
I planned for my pillow to have all the pieces sort of tetris-ed together, I didn't want all the patches the same size. So I would attach 2 together, sew, then attach another, sew, and kept going until my fabric was long enough (hold it up to the pillow you are trying to cover to measure.) I did two shirts across, then kept adding to the bottom until I had a long piece of fabric.
Step 4: Clean up the back
You will probably have a lot of extra fabric and thread on the back, cut as close to your seam as possible so your pillow won't be lumpy!
Step 5: Sew up two sides
Turn your fabric inside out and fold it in half. Make sure it is even and lined up and then pin one side together. I first measured and marked it with my ruler and fabric pencil. Sew together that side then repeat for the other side. Turn the pillow right side out to check that it is the right size, then turn it back inside out to cut off the excess fabric (except for the top, leave an inch or two of the excess there.)
Step 6: Insert pillow and hand sew the top up.
Once your pillow is inside, try and fold over the edges and hold or pin together and sew together a clean edge.
Step 7: Lay on the pillow and rock out with your headphones like you're 16 again!


